Help Guide
Use the builder to create or import MAME `.lay` files.
This guide covers the normal workflow for building a layout from scratch, importing an existing `.lay`, attaching artwork, using lock mode, checking alignment in the preview, and exporting the final XML.
The builder creates `.lay` XML in the browser, previews bezel and artwork placement, and helps you rebuild imported layouts without needing a backend or database.
Overview
Layout and controls
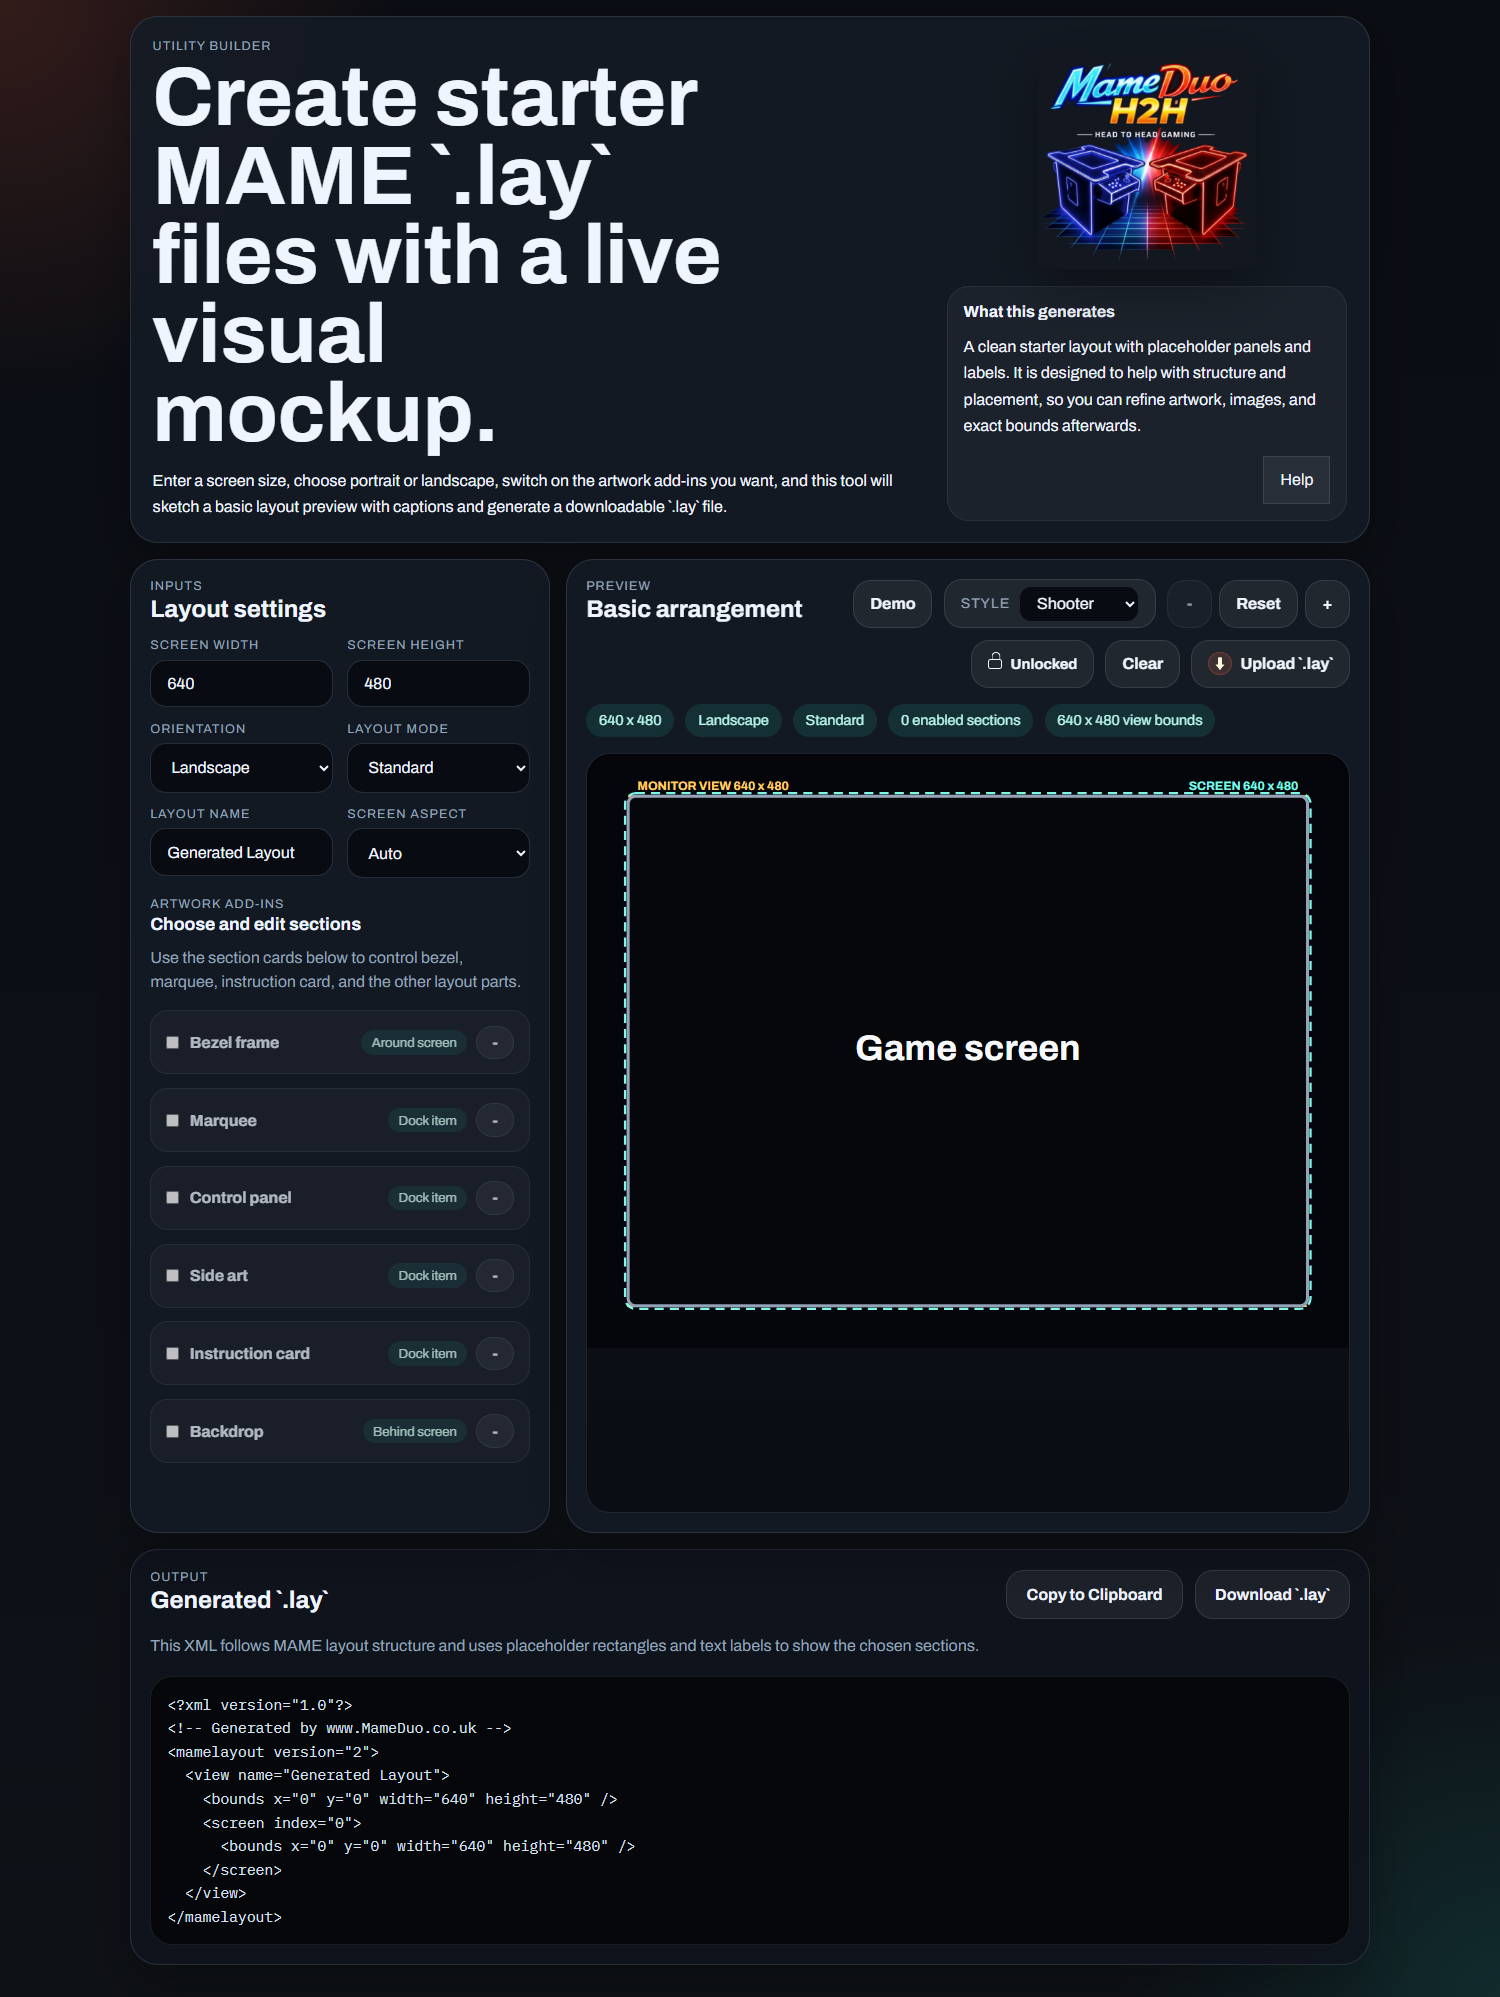
- Use the left panel to enter screen size, orientation, screen aspect, and artwork options.
- Use the preview toolbar for Demo, Style, Zoom, Lock, Clear, Upload `.lay`, and Help.
- Use the Output panel to copy the XML or download the generated `.lay` file.
- The preview updates live as settings change.
Start by setting the monitor size first. That gives you a stable preview boundary before you begin placing artwork.
Manual Build
Create a layout from scratch
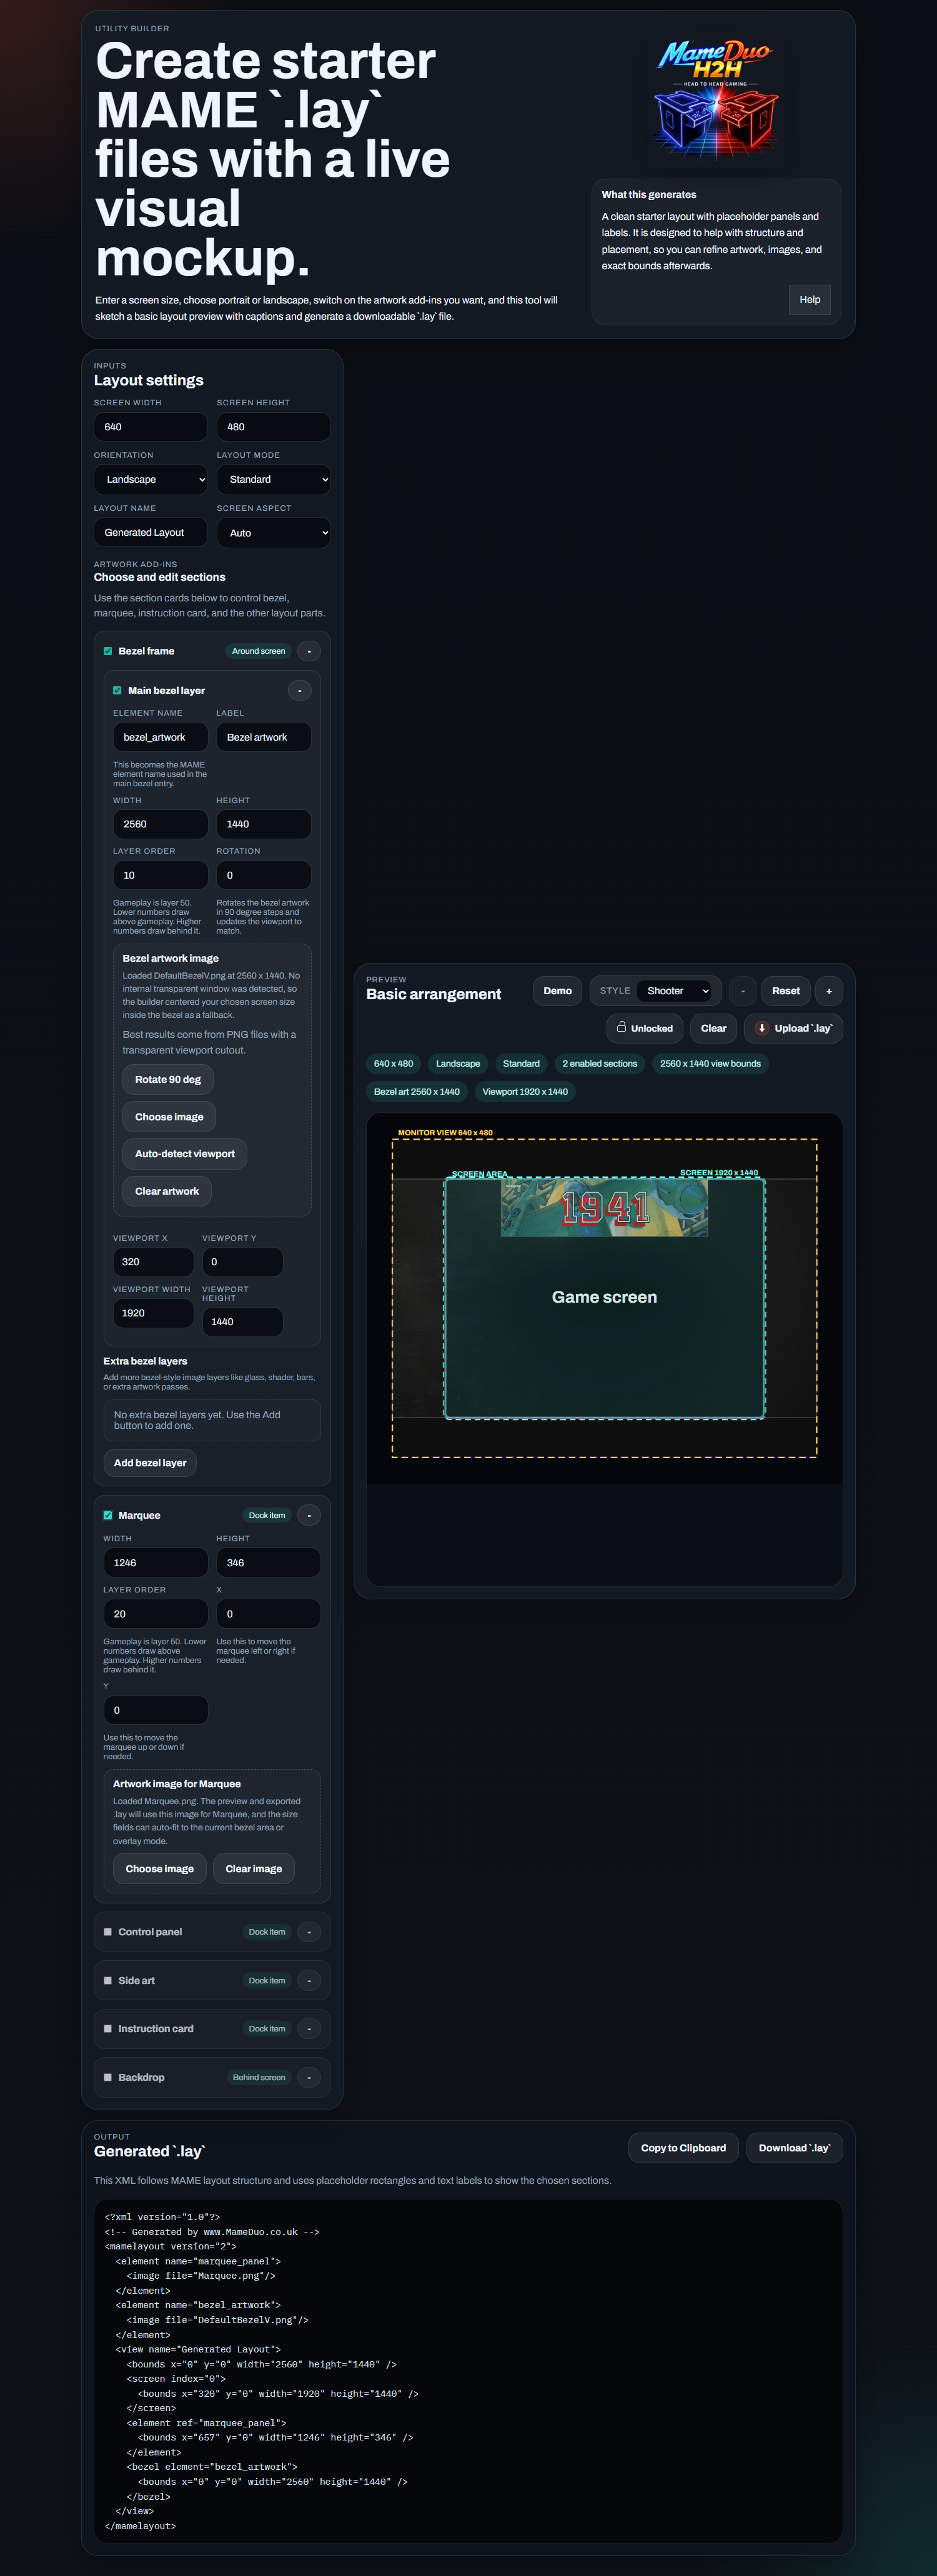
- Turn on only the sections you want to use.
- The main bezel layer includes Element name, Label, Width, Height, X, Y, Layer order, Rotation, and artwork tools.
- Extra bezel layers can be added with Add and each one has its own enable toggle, label, image, and XML element name.
- Marquee supports width, height, X, Y, rotation, and layer order.
- Instruction card supports left, right, top, or bottom placement plus X and Y offset.
If a bezel image is loaded, the builder can auto-detect a visible gameplay window or fit one as a fallback. Use the viewport fields to fine-tune the result if needed, including negative X or Y values when you want the gameplay area to sit beyond the layout origin.
Secondary Display
Use a second physical monitor
- Choose `Secondary Display` when you want gameplay on one monitor and artwork such as a marquee on another.
- Use `Display 1 placement` and `Display 2 placement` to define the two physical screens clearly.
- `Display 2 placement` controls the second monitor side, width, height, and orientation.
- Use the `Display 1`, `Display 2`, and `Full view` tabs in the preview to inspect each monitor separately or both together.
- Display 1 and Display 2 keep their own artwork, so a bezel can stay on display 1 while a marquee or other item is attached to display 2.
- The exported `.lay` creates separate views named `\\.\DISPLAY1` and `\\.\DISPLAY2` for MAME multi-monitor output.
For MAME, set `numscreens 2`, `screen0 \\.\DISPLAY1`, `screen1 \\.\DISPLAY2`, `view0 \\.\DISPLAY1`, and `view1 \\.\DISPLAY2` in your MAME configuration so each physical monitor uses the correct generated view.
Import
Import an existing `.lay` file
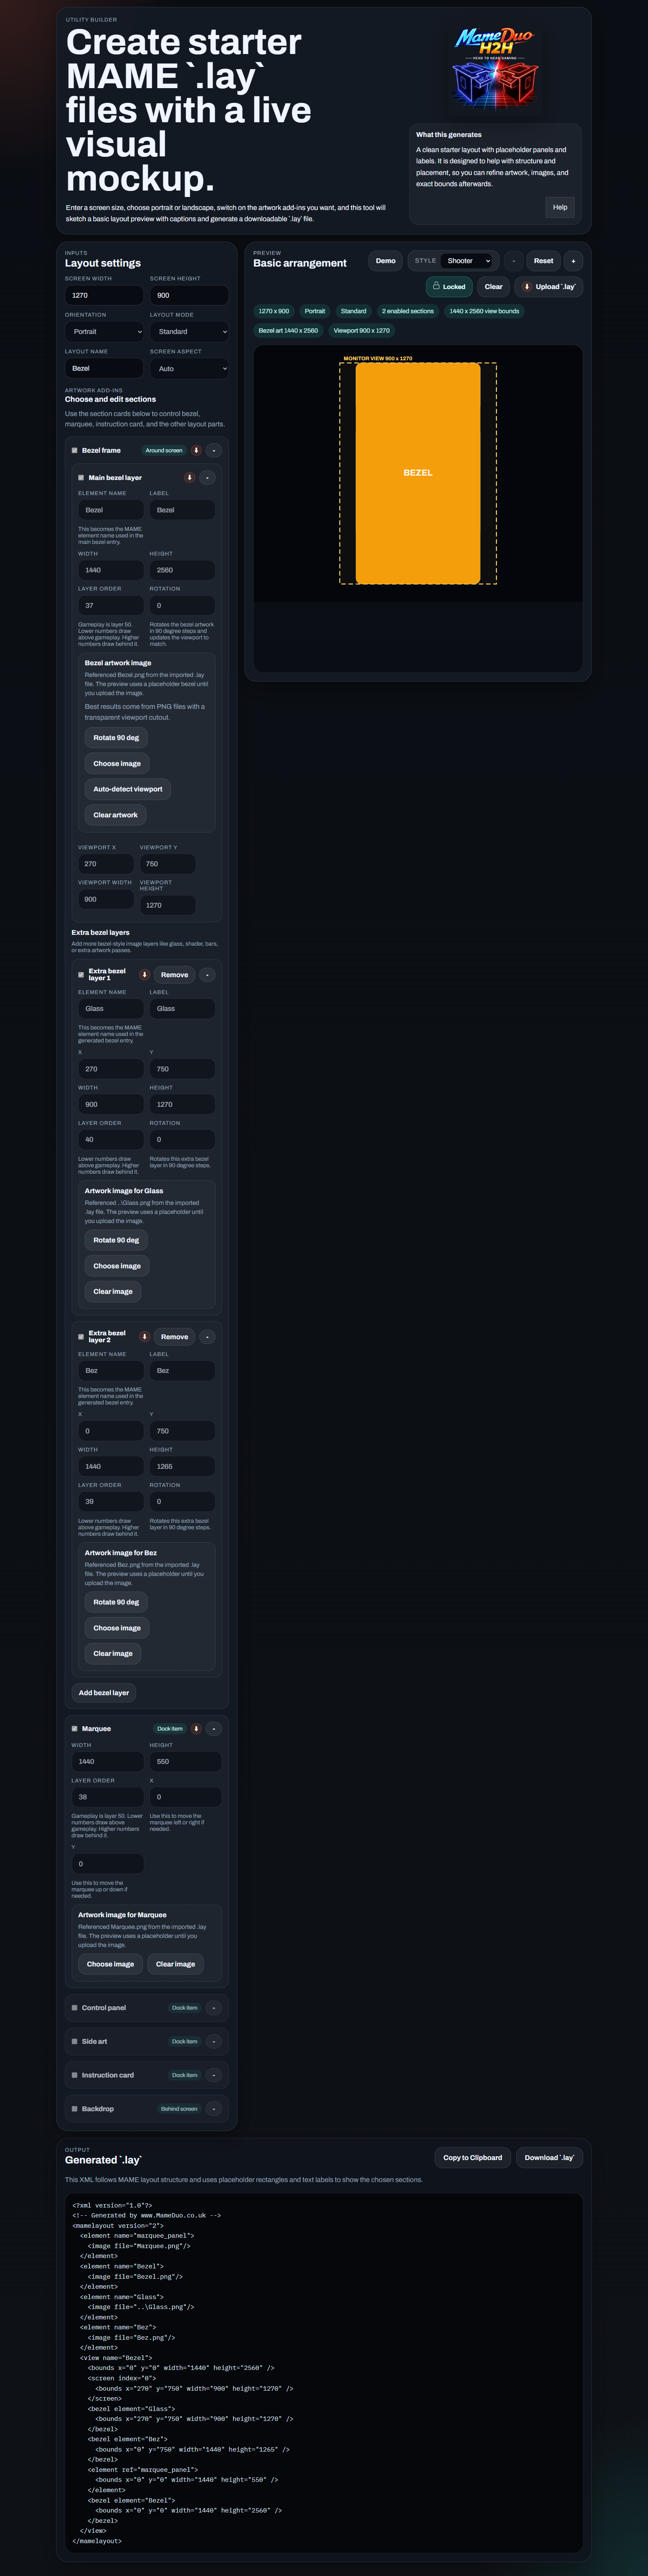
- Use Upload `.lay` to import an existing layout into the real editor.
- Imported main bezel details appear in the main bezel layer fields.
- Imported extra bezel layers are rebuilt as editable layer cards in the bezel section.
- Imported image references appear as placeholders until you upload the matching artwork image files.
- Imported items show a small import icon so you can see what came from the uploaded file.
When a `.lay` is imported, the builder locks the layout settings by default so you can attach artwork files without accidentally changing the imported measurements.
Lock Mode
Lock or unlock the layout
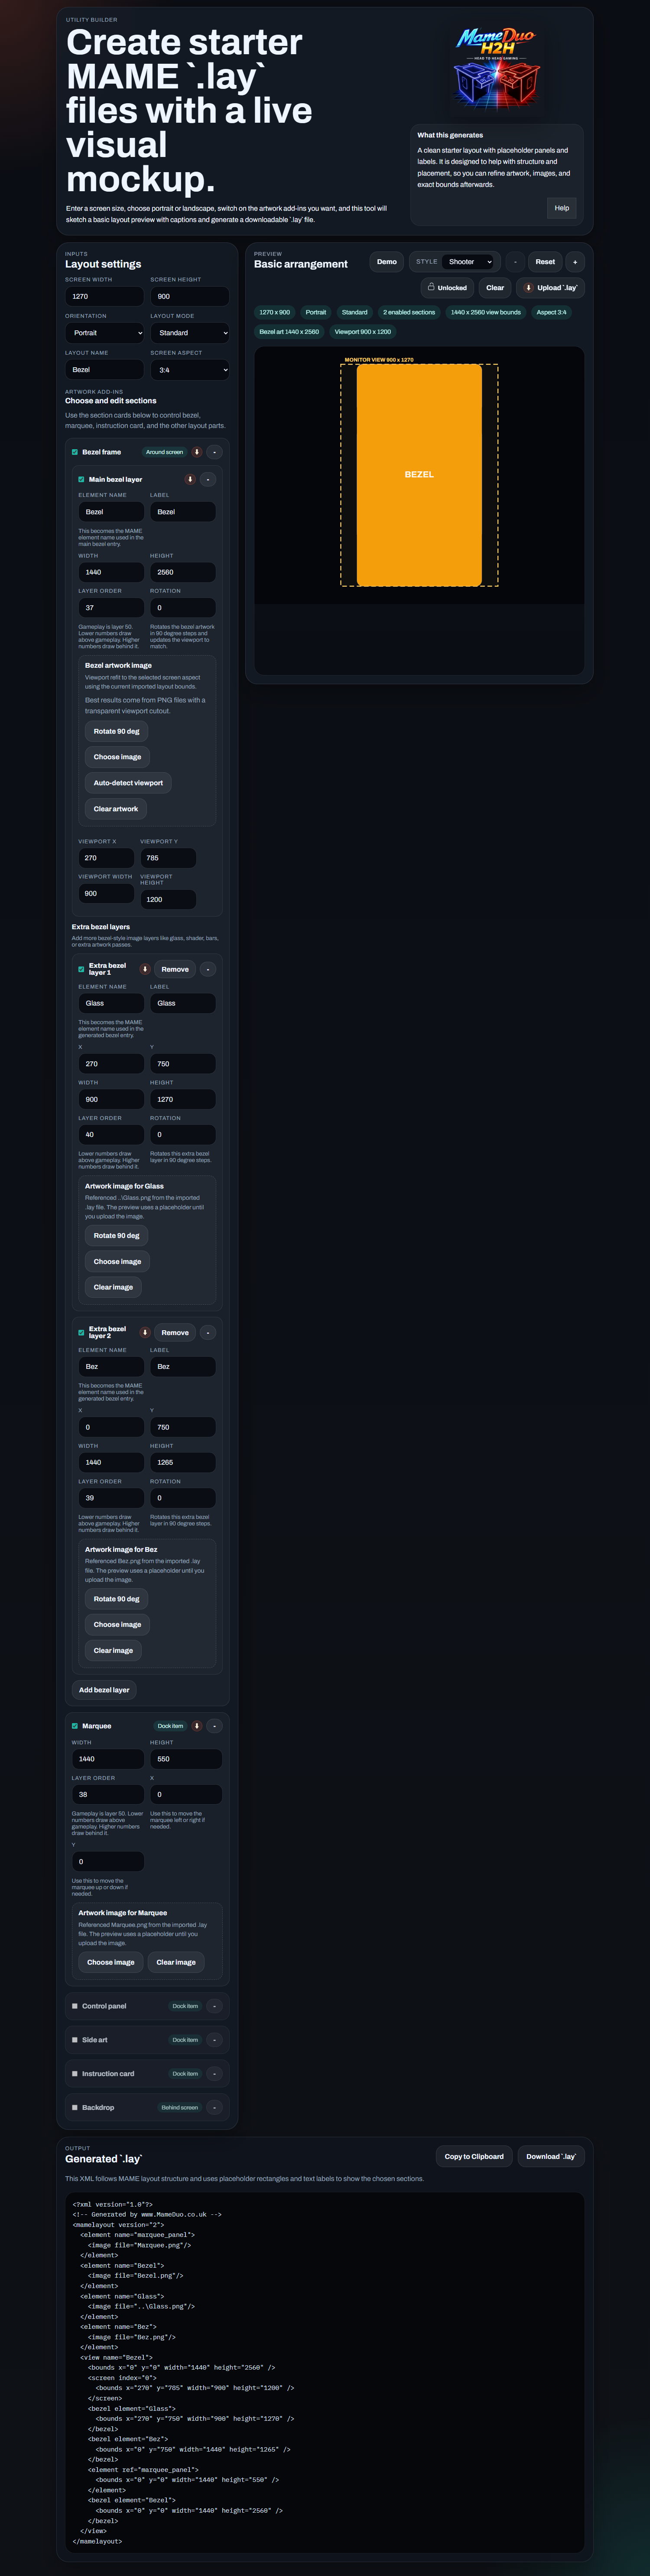
- Lock mode is available for both manual layouts and imported layouts.
- When locked, measurement fields stay frozen but artwork upload actions remain available.
- Unlock when you want to change geometry such as viewport size, screen aspect, or item dimensions.
- After unlocking, Screen aspect refits from the original imported viewport area rather than shrinking repeatedly.
A good workflow is: import or build the layout, lock it, test artwork files, then unlock only when you need to change geometry.
Preview
Check alignment in the preview
- The yellow dashed outline shows the monitor boundary.
- The cyan dashed outline shows the gameplay screen boundary.
- The preview scales proportionally to match MAME-style fit behavior.
- Use `+`, `-`, or mouse wheel to zoom the preview.
- When zoomed in, click and drag the preview to pan to the area you want to inspect.
- Reset returns the preview to the normal centered view.
- Demo mode can show a moving sample scene for visual reference inside the gameplay area.
Export
Save or copy the result
- Copy to Clipboard copies the XML shown in the Output panel.
- Download `.lay` saves the current layout file.
- Referenced image filenames are written directly into the XML when artwork is loaded or imported by reference.
- Keep the exported `.lay` file in the same MAME artwork folder as the PNG files it references.
- Secondary Display export also writes separate MAME views for `\\.\DISPLAY1` and `\\.\DISPLAY2`, plus a `Full View` reference view.
If you want an offline version of this guide, use the PDF link at the top of this page.